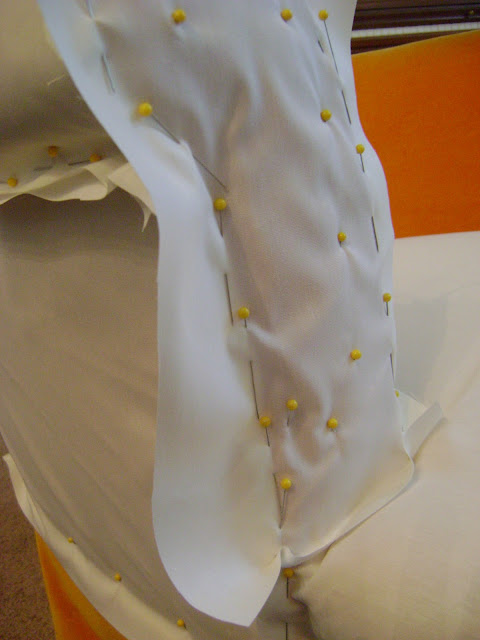
So I finally had a few minutes to get back
to my chair slipcover project.
I am struggling with how these
photos are showing up,
but I suppose that is what happens with
an orange chair and a yellow tape measure.
I thought long and hard
about how I wanted to make this slipcover.
With an upholstered chair,
you often use a lot of pieces in order
to really mold and fit around the frame.
But with a slipcover,
you can simplify the lines
and do larger pieces that just
smooth over the frame.
I decided to skip the front band piece
between the seat and skirt.
I like to start my slipcovers by making
a "muslin".
I know some people are brave
and can make the slipcover with the
actual fabric and do a great job.
However, I prefer a fitted slipcover
and I don't want to run the risk
of wasting my fabric if I make a big mistake.
So I start with big rectangles of a muslin
fabric that I can write on and cut to fit.
I use drapery lining fabric
because I have a lot left over from
old window treatment projects.
But you can use regular muslin
or an old sheet,
or just some fabric you don't love.
I would use a fabric with the same
amount of give that your slipcover fabric has
because you want to know how it will lay
on the chair.
I center the rectangle on the seat and then start
tucking it in, all around.
Then I cut away the excess,
so that I can start to get the shape
of the seat to use as a pattern piece.
But I am careful to leave enough
to have a seam allowance.
This is the corner of the seat
and covers that front band.
I will cut off that excess at the corner
so that it is fitted.
Once I got the seat piece cut the way I wanted it,
I put the rectangle of fabric on the back and
did the same thing.
So I start tucking and cutting
into the corners to get the shape.
Don't cut too deeply into the corners
because you are going to need
seam allowances to sew.
Next, I pinned all along the curve
of the chair back.
This is important for this chair,
because if I cut it straight,
it would not fit properly.
I trimmed off the extra,
leaving a seam allowance of about 5/8".
I put my clear quilting ruler on the top
of the back of the chair,
so you can see how curved it is.
When I cut the piece that goes
on the top and sides
of the back, I will need to take this into account.
Next I pinned the next rectangle
over the arm and started
pinning the front curve.
The clear quilting ruler
is useful here too,
for showing the angle of the arm front.
Then I pinned the outside arm panel
to the inside arm panel,
which wrapped around the arm.
I left enough seam allowance to pin
the arm pieces together.
Then I pinned another piece
to the front of the arm,
pinning all along the curve.
Following the curve of the arm,
I trimmed off the excess ,
leaving a seam allowance.
I used a soft pencil to trace
the line of the piping underneath.
This is just a good way to mark the
shape of the chair on the pieces.
Ok, that is all I have for today.
More photos coming.
Happy Sewing!
Sivje


5 comments:
WOW I am the very first to post on this today. Babe, you are TOTALLY AMAZING AND I LOVE YOU. Your mother!
This is so impressive, Sivje. You make it seem sew easy but I know it isn't. I will be starting mine soon and am soaking up every word here. Thanks so much for sharing such a detailed process. And tell your Mom we all think you are Totally Amazing as well!
A belated thank you for stopping by my blog!:) I love that you are slipcovering furniture~ I love doing that, too!
This will come out great! And I have this old pink chair that's looking pretty tired...
Your talent AMAZES me, my friend! I always THINK I want to learn to sew, and then I end up frustrated with my machine, or something doesn't work the way I think it should...and then I quite trying for several more years, LOL. You make it all sound so easy!
Post a Comment