

I love all dress forms and mannequins.
I have been very blessed with some of my dress forms as
gifts from sewists who no longer needed them.
That was the case with my beloved adjustable dress form.
A dear friend from Grass Valley handed her dress form to me
when she was no longer sewing as often as she liked.
She knew I sewed nearly every day, between garments
for my daughters and myself, custom creations for clients,
and alterations, especially bridal gowns.
This year, I have been quite busy with making
aprons and pillows for custom orders,
as well as many, many alterations.
I have altered several bridal gowns this year,
but none needed to be worked on while on the dress form.
So, I had not noticed how sad my form had become.

Her cover was literally crumbling off her!
I am currently working on a Vera Wang bridal gown alteration
and I could not bear to put that gorgeous gown
on my poor sad dress form.
So, it was time to clean her up and recover her.
Now this was a daunting job, but last year I recovered my sofa,
so I knew I could do it!

I just pulled a little and all of the old fabric came off easily.

I started to take apart the pieces by unscrewing the adjustable wheels
that held together the pieces of the form.
I am sure there is a name for them but I have no clue what they are called.

These are the adjustable wheels that held together the form body parts.
They were specific to the bust, waist and hip so I labeled them.

As I got the form pieces apart, I realized that the cover and old glue
needed to be removed and the form parts needed a good washing.

This is the pole that held the form.

I gave them a good scrubbing with Dawn Dish soap
because I am convinced that it holds the secret to all things.

I let the pieces dry.

I tried to use the old fabric as a pattern but it was pretty stretched out,
however I was able to use the width and length as a general idea.
I chose a cotton lycra fabric with a moderate stretch,
so that it would conform to the shape of the body pieces.

I used Aleene's Tacky Spray.
It would probably work as well with a different glue
brushed on the inside edge of the body pieces.

I worked one part at a time, spraying each piece,
then carefully covering the part with the fabric.
I probably made my job harder by choosing a stripe,
but I really liked how fresh it looked.
Once I sprayed the glue onto the outside of the plastic,
I worked from the bottom up, smoothing the fabric onto the part,
and carefully adjusting the stripes.

Here are the hip pieces all ready to assemble.

I reattached each adjustment wheel by screwing the tiny screws directly through
the fabric. I had to feel around for the little holes.
The fabric kind of puckered a little bit but it was so much nicer than before.
So I decided to just leave it.

As we attached each hip piece, there was a metal piece that had to be
screwed back to the pole. This was tricky with only my two hands.
So Ahnalin offered her hands to hold the pieces
while I screwed them in place.

Here is the lower half hip area of the dress form all attached,
and ready for the upper torso pieces to be attached.

I followed the same "spray and smooth" method on the upper torso pieces.
I took special care to stretch the fabric over the "Fronts"
as Millie calls them in "Thoroughly Modern Millie",
which was playing on the DVD player while I was working.
This is where the need for a moderate stretch in a fabric
really shows it's importance!
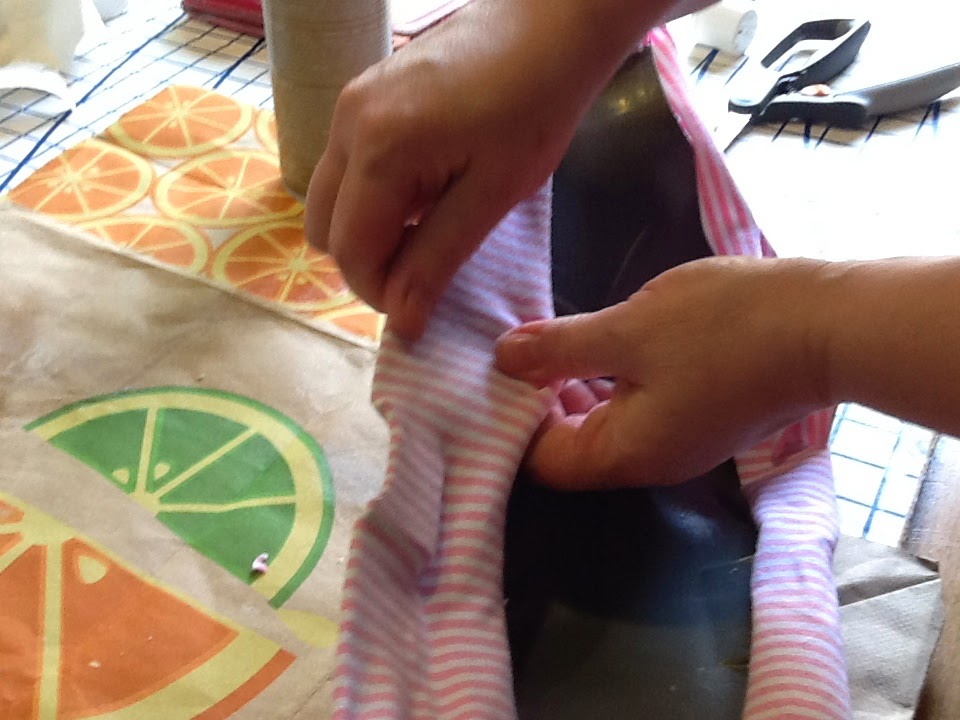
I should have shown this earlier, but this is how I fixed the
inside of the body pieces.
I sprayed along the inside edge and pulled the fabric
snuggly from the edge.

And then I trimmed off the excess.
I probably should have trimmed it more
evenly but at this point, my hands were really sticky
from the spray adhesive.

This is how the inside of one of the upper torso
pieces looked after it was all glued and covered.
There was a little metal hook piece on the right and left
side of the bottom that slipped onto the waist of
each hip piece.

After the torso pieces dried,
I slipped each piece over the waist
of the hip pieces.

Then I reattached the adjustable wheel pieces for the upper torso pieces.

This is how the inside of the dress form looked.
I normally want the insides of the things I create
to be just as lovely and perfect as the outside.
But to be honest, I was just ready to get this done,
so I could get back to the bridal gown alterations!
Not a great excuse, but it is the truth.

At the very top of the adjustable dress form,
there is a little knob that screws into the neck plate.
This knob is then turned to adjust the back waist length
of the torso.
But it also acts as a pincushion.
To cover it, I cut a small circle of the fabric
and stuffed the edges into the rim using a butter knife.

The neck piece attached to the upper torso
pieces with four tiny clips, which were slid
into grooves at the top of the pole.
One of the four clips must have been lost
in one of our many moves,
so one of the torso pieces didn't fit snugly onto the neck.
I will need to find a fix for that.
But for now, I tied a piece of fold-over-elastic
around the neck to hold it in place.

By this point, my hands were a sticky gooey mess!
That Tacky Spray is sticky stuff that does not
want to just wash off!
The answer for me was coconut oil!

I put about a teaspoon into my palm and rubbed it all over my hands.
The oil was very effective in breaking down the glue so it
washed off my hands, without having to use something toxic.

At this point, I was ready to show off my lovely "new" dress form!
However, the wind was blowing so strong that she blew right over!

Yes! The wind was blowing 21 MPH!

So Ahnalin helped me out again by holding her up!

All in all, I am pretty pleased with how the dress form turned out.
Now, back to my alterations!
Happy Sewing!
Sivje


