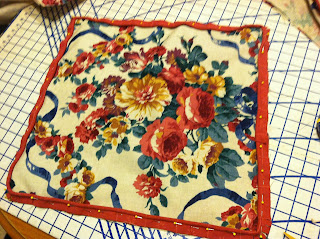
So after I recovered my tuffet,
I decided that the throw pillows on the sofa
and chairs were looking old and dull.
I measured my pillows and cut the pieces I needed,
allowing an extra inch all the way around,
for a 1/2" seam allowance.
These pillows were about 17" square.
So I cut two pieces of 18"x18" for each pillow.
I pulled out some of the leftover piping
I had from when I made my new sofa slipcover.
You can read all about my sofa slipcover and how I made the piping
HERE.
I pinned it along the outside edge of one
side of the pillow fabric.
I snipped into the seam allowance of the piping
so it would curve around the pillow corner.
I cut the piping a bit long where it meets up.
I cut off the excess piping cord to reduce bulk.
Folding the edge of one side of the piping under,
I wrap it around the other side.
Then I just pin it and sew it down.
I am using my piping foot on my Janome
machine but I usually use my zipper foot
on my Bernina for large piping.
This is what it looks like with the piping all pinned in place.
Next, I pulled out a long zipper
from my stash so I could make the new
pillow cover removeable.
Using my zipper foot,
I sew the zipper onto the piping,
wrong side up.
If I sew it right side up, I will not
be able to open up the zipper when it is on the pillow.
Next, I lay the back piece of the pillow
on to of the front piece,
right sides together,
matching up the sides,
and pin the seam allowances to the other side of the zipper.
I sew the zipper in place.
After the zipper is sew in place,
I can lay open it up and see that it is ready
to sew the rest of the pillow sides together.
This is how it looks from the back side.
Make sure that you have unzipped the zipper several
inches so you can get into the pillow cover
after the sides are all sewn.
Match up your sides and pin all the way around.
Using your zipper or piping foot,
sew as close to your piping edge as you can.
You can follow the line of stitching you used
when you sewed the piping on,
or move your needle position 1 or 2 clicks
further away from your foot.
Go slow and careful around the corners.
You can see that I am sewing over the extra length
of the zipper end.
When you finish sewing,
you can trim the corners or not.
I usually do not for piped corners
as the extra fabric kind of fills out
the corner nicely.
The zipper is snug against the piping and makes it very easy
to remove the pillow cover for washing,
or just when you decide you need a change.
This was actually an old zipper that I reused.
All finished and pretty.
Because of the placement of the print on the fabric,
and because I didn't want to waste any
of my beloved fabric,
I was not able to center the floral motif on each pillow.
But I love them anyway.
I am glad I finally cut into this fabric.
And pillows are a great way to add
color using just a little bit of a favorite fabric.
Happy Sewing!


4 comments:
Gorgeous job! Can you come to Iowa and help me feather my nest? :)
Looks great Sivje.
Well done, Goose!! As well as the tuffet, too. I'm always so impressed with your sewing talents. You're not afraid to tackle anything.
You should advertise the "Tie One On Day" on your blog with a link to your apron patterns!
Have a wonderful Thanksgiving, Hon!
fondly,
Rett
Your floral-patterned throw pillows created a good contrast to your sofa and chairs, especially since they have a solid color. It normally wouldn't work on couches that are highly-patterned, so I guess it all turned out for the best. You did a great job, btw! Never mind that the main floral pattern wasn't centered; you can always make another off-centered one and place the pillow with the centered pattern in the middle of the couch and flank it with the two off-centered one, just to make it seem like it was on purpose in the first place. ;)
Jon Snow
Post a Comment